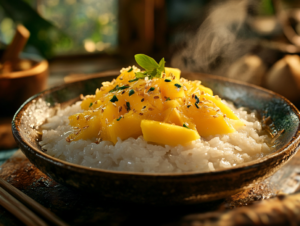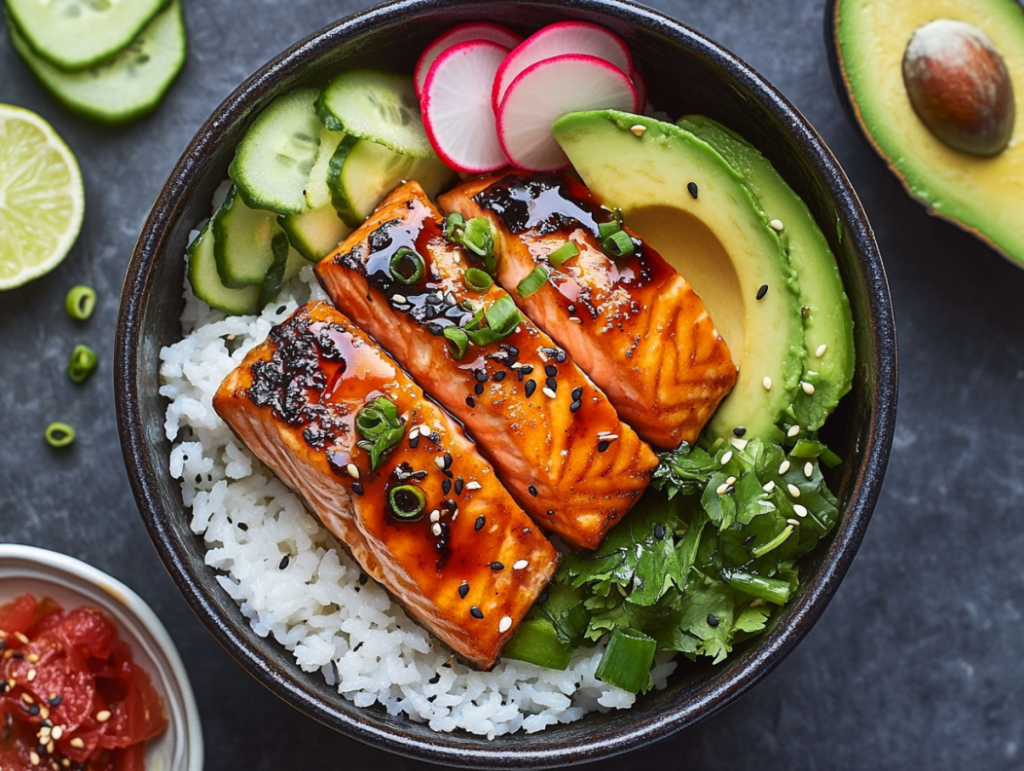
If you’re looking for a meal that perfectly balances savory, sweet, and umami flavors while being nutritious and visually stunning, the Sticky Miso Salmon Bowl is your answer. This dish combines perfectly glazed, flaky salmon with a rich miso marinade, fluffy rice, and fresh toppings that provide crunch, creaminess, and bursts of flavor in every bite. Whether you’re making this as a weeknight dinner or a meal-prep favorite, the miso-glazed salmon bowl delivers restaurant-quality taste with minimal effort.
Miso, a traditional Japanese ingredient made from fermented soybeans, lends a deep umami flavor that complements the natural richness of salmon. Combined with honey for sweetness, ginger for spice, and a touch of citrus for brightness, this dish creates a glaze that caramelizes beautifully under the broiler, creating a slightly crispy, golden-brown finish. When paired with perfectly seasoned sushi rice and a variety of fresh vegetables, the result is a dish that feels indulgent yet remains wholesome and nourishing.
One of the best things about this recipe is its versatility. You can customize the toppings based on your preferences, add extra crunch with toasted sesame seeds, or enhance the flavor with chili crisp or kimchi. Plus, with a simple marinade that takes just minutes to prepare, this meal is surprisingly quick to put together. Whether you’re an experienced home cook or just starting out, this Sticky Miso Salmon Bowl will impress you with its depth of flavor and ease of preparation.
Ingredients
For the Salmon and Marinade:
-
4 (6- to 8-ounce) skinless salmon fillets
-
3 tablespoons white miso paste
-
2 tablespoons honey or maple syrup
-
1 tablespoon vegetable or sesame oil
-
1 tablespoon freshly grated ginger
-
1 tablespoon soy sauce
-
2 teaspoons rice vinegar
-
1 tablespoon grapefruit or orange juice (for a hint of citrus)
-
Salt and freshly ground black pepper
For the Rice:
-
1.5 cups sushi rice
-
2¼ cups water
-
4 tablespoons rice vinegar
-
2 tablespoons granulated sugar
-
1 teaspoon salt
Toppings and Garnishes:
-
1 avocado, sliced
-
1 small cucumber, thinly sliced
-
4 radishes, thinly sliced
-
¼ cup kimchi (optional)
-
2 scallions, thinly sliced
-
1 tablespoon sesame seeds (black or white)
-
1 sheet nori, cut into strips
-
Chili crisp (optional)
-
Lime wedges for serving
Directions
Step 1: Prepare the Rice
Start by rinsing the sushi rice under cold water until the water runs clear, which helps remove excess starch and prevents stickiness. In a medium saucepan, combine the rinsed rice with water and bring it to a boil. Reduce the heat to low, cover the pot, and let the rice simmer for 18 minutes. Avoid lifting the lid to ensure even cooking. Once done, remove the pot from heat and let it steam for another 10 minutes.
For perfectly seasoned sushi rice, warm rice vinegar, sugar, and salt in a small saucepan until dissolved. Gently fold this mixture into the cooked rice, being careful not to mash the grains. This simple step enhances the flavor of the rice and complements the miso-glazed salmon beautifully.
Step 2: Make the Miso Marinade and Marinate the Salmon
In a small bowl, whisk together white miso paste, honey, soy sauce, vegetable oil, grated ginger, rice vinegar, and citrus juice. This mixture will create a thick, glossy marinade that coats the salmon beautifully. Lightly season the salmon fillets with salt, then brush the marinade over each piece, ensuring they are evenly coated. Let the salmon sit at room temperature for at least 15-20 minutes to absorb the flavors. If you have more time, marinating for up to an hour in the refrigerator will enhance the depth of flavor even further.
Step 3: Cook the Salmon
Preheat the broiler and position a rack about 5 inches from the heat source. Line a baking sheet with aluminum foil and lightly grease it to prevent sticking. Arrange the salmon fillets on the prepared baking sheet, spooning any remaining marinade over the top. Broil for 5-7 minutes, depending on the thickness of the fillets, until the glaze is bubbling and caramelized. The salmon should be slightly crispy on the edges while remaining moist and tender on the inside. For extra char, you can leave it under the broiler for an additional minute, but watch carefully to prevent burning.
Step 4: Assemble the Bowls
Fluff the cooked sushi rice with a fork and divide it among four serving bowls. Place a perfectly cooked miso-glazed salmon fillet on top of the rice. Arrange the sliced cucumber, avocado, radishes, and kimchi (if using) around the salmon. Sprinkle with sesame seeds and sliced scallions, then garnish with strips of nori and a drizzle of chili crisp for a spicy kick. Serve with lime wedges on the side for a burst of freshness.
Nutritional Information (Per Serving)
-
Calories: ~600 kcal
-
Protein: 35g
-
Carbohydrates: 65g
-
Dietary Fiber: 5g
-
Sugars: 12g
-
Fat: 20g
-
Saturated Fat: 3g
-
Cholesterol: 80mg
-
Sodium: 800mg
Note: These values are approximate and can vary based on specific ingredient choices.
Tips for the Best Sticky Miso Salmon Bowl

Use the Right Miso: White miso (shiro miso) has a mild, slightly sweet taste, making it perfect for this dish. If using a darker miso like red miso, be aware that it has a more intense and salty flavor, so you may want to adjust the amount accordingly.
Don’t Overcook the Salmon: Since salmon continues to cook slightly after being removed from heat, it’s best to broil it until just opaque in the center. A cooking time of 5-7 minutes is ideal for most fillets.
Customize Your Toppings: While avocado, cucumber, and radishes provide a great balance of texture and flavor, feel free to experiment with additional toppings like edamame, pickled ginger, shredded carrots, or even a soft-boiled egg.
Make It Spicy: If you love heat, drizzle chili crisp or sriracha over the bowl. A dash of gochujang (Korean chili paste) mixed into the miso marinade can also add an extra layer of spice.
Meal Prep Option: This dish is fantastic for meal prep! Store the components separately in airtight containers, and when ready to eat, simply reheat the salmon and assemble the bowl. The rice can be refreshed by microwaving it with a damp paper towel to restore its softness.
Why This Sticky Miso Salmon Bowl Stands Out
This dish brings together the best elements of Japanese and fusion cuisine, creating a balanced, flavor-packed meal that’s both nourishing and satisfying. The miso marinade infuses the salmon with a deep umami taste, while the natural sweetness from honey and citrus juice enhances its caramelization. Paired with seasoned rice and an assortment of crisp and creamy toppings, every bite delivers a perfect contrast of textures and flavors.
Not only is this dish visually stunning, but it’s also incredibly easy to prepare. With a short marination time and quick broiling method, you can have a restaurant-quality meal on the table in under 30 minutes. Plus, it’s a healthy option rich in omega-3 fatty acids, lean protein, and essential vitamins, making it an ideal choice for those who want both flavor and nutrition in one dish.
So, whether you’re making it for a weeknight dinner, meal prep, or an impressive dish to serve guests, this Sticky Miso Salmon Bowl is guaranteed to be a hit. Try it once, and it might just become your new favorite way to enjoy salmon!
Storage and Reheating Tips: How to Enjoy Leftovers
One of the best things about this Sticky Miso Salmon Bowl is that it stores well, making it a great option for meal prep. To ensure the best quality, store each component separately in airtight containers. The salmon will keep in the refrigerator for up to 3 days, while the rice should be consumed within 2 days for optimal freshness. If you plan to store the rice longer, you can freeze it and reheat it with a little steam to restore its texture.
When reheating, avoid using the microwave for salmon, as it can dry out the fish and change its texture. Instead, warm the salmon in an oven or toaster oven at 300°F (150°C) for about 8-10 minutes until just heated through. For a quick option, you can also pan-sear it over low heat for a few minutes. To refresh the rice, place a damp paper towel over it and microwave in 30-second intervals until warm, or lightly steam it on the stovetop.
If you’re planning to take this dish on the go, pack the toppings separately and assemble the bowl fresh when you’re ready to eat. This will help preserve the crispness of the vegetables and prevent any unwanted sogginess. With these simple storage and reheating tips, you can enjoy the delicious flavors of your Sticky Miso Salmon Bowl even on busy days!
Conclusion: A Must-Try Recipe for Flavor and Simplicity
The Sticky Miso Salmon Bowl is more than just a meal—it’s a perfect balance of taste, texture, and nutrition, all in one beautiful dish. Whether you’re a fan of Japanese cuisine, looking for a healthy weeknight dinner, or simply want to try a new way to prepare salmon, this recipe delivers in every aspect. With its rich umami miso glaze, tender flaky salmon, and an array of fresh, vibrant toppings, each bite offers an explosion of flavors that make it truly unforgettable.
What makes this dish even more special is its versatility. You can tweak the toppings, adjust the marinade to suit your taste, and even swap the rice for a grain of your choice, making it ideal for various dietary preferences. Plus, with a quick preparation time and easy cleanup, it’s a stress-free recipe that doesn’t compromise on quality.
If you haven’t tried this dish yet, now is the perfect time to add it to your recipe rotation! Once you taste the sticky miso glaze caramelized to perfection, paired with creamy avocado, crunchy vegetables, and fluffy rice, you’ll understand why this bowl is a game-changer. Give it a try, experiment with your favorite toppings, and most importantly—enjoy every delicious bite!
Now, over to you! Have you tried making a Sticky Miso Salmon Bowl? What are your favorite toppings to add? Share your thoughts in the comments below, and don’t forget to save this recipe for later! Happy cooking! 🍜🐟✨
Print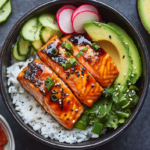
Sticky Miso Salmon Bowl: A Flavorful, Healthy, and Satisfying Meal
Ingredients
For the Salmon and Marinade:
-
4 (6- to 8-ounce) skinless salmon fillets
-
3 tablespoons white miso paste
-
2 tablespoons honey or maple syrup
-
1 tablespoon vegetable or sesame oil
-
1 tablespoon freshly grated ginger
-
1 tablespoon soy sauce
-
2 teaspoons rice vinegar
-
1 tablespoon grapefruit or orange juice (for a hint of citrus)
-
Salt and freshly ground black pepper
For the Rice:
-
1.5 cups sushi rice
-
2¼ cups water
-
4 tablespoons rice vinegar
-
2 tablespoons granulated sugar
-
1 teaspoon salt
Toppings and Garnishes:
-
1 avocado, sliced
-
1 small cucumber, thinly sliced
-
4 radishes, thinly sliced
-
¼ cup kimchi (optional)
-
2 scallions, thinly sliced
-
1 tablespoon sesame seeds (black or white)
-
1 sheet nori, cut into strips
-
Chili crisp (optional)
-
Lime wedges for serving
Instructions
Step 1: Prepare the Rice
Start by rinsing the sushi rice under cold water until the water runs clear, which helps remove excess starch and prevents stickiness. In a medium saucepan, combine the rinsed rice with water and bring it to a boil. Reduce the heat to low, cover the pot, and let the rice simmer for 18 minutes. Avoid lifting the lid to ensure even cooking. Once done, remove the pot from heat and let it steam for another 10 minutes.
For perfectly seasoned sushi rice, warm rice vinegar, sugar, and salt in a small saucepan until dissolved. Gently fold this mixture into the cooked rice, being careful not to mash the grains. This simple step enhances the flavor of the rice and complements the miso-glazed salmon beautifully.
Step 2: Make the Miso Marinade and Marinate the Salmon
In a small bowl, whisk together white miso paste, honey, soy sauce, vegetable oil, grated ginger, rice vinegar, and citrus juice. This mixture will create a thick, glossy marinade that coats the salmon beautifully. Lightly season the salmon fillets with salt, then brush the marinade over each piece, ensuring they are evenly coated. Let the salmon sit at room temperature for at least 15-20 minutes to absorb the flavors. If you have more time, marinating for up to an hour in the refrigerator will enhance the depth of flavor even further.
Step 3: Cook the Salmon
Preheat the broiler and position a rack about 5 inches from the heat source. Line a baking sheet with aluminum foil and lightly grease it to prevent sticking. Arrange the salmon fillets on the prepared baking sheet, spooning any remaining marinade over the top. Broil for 5-7 minutes, depending on the thickness of the fillets, until the glaze is bubbling and caramelized. The salmon should be slightly crispy on the edges while remaining moist and tender on the inside. For extra char, you can leave it under the broiler for an additional minute, but watch carefully to prevent burning.
Step 4: Assemble the Bowls
Fluff the cooked sushi rice with a fork and divide it among four serving bowls. Place a perfectly cooked miso-glazed salmon fillet on top of the rice. Arrange the sliced cucumber, avocado, radishes, and kimchi (if using) around the salmon. Sprinkle with sesame seeds and sliced scallions, then garnish with strips of nori and a drizzle of chili crisp for a spicy kick. Serve with lime wedges on the side for a burst of freshness.